Wednesday 5 December 2007

Imagekind Gallery Art

canvas art

I have just opened a gallery at Imagekind to sell some of my work to customers in the USA. You can see the available art prints at my Imagekind Art Gallery where you can purchase prints as canvases or framed posters. Currently at Fotoviva Art Prints we do not offer framed prints so this is a bonus to buyers, especially from the USA.

I'm just testing this online gallery out first to see how sales go so for now there is only one gallery with the allowed images uploaded.

Sunday 18 March 2007

New Blog Site!

We have been busy working on a new photoblog which has just launched so please amend your bookmarks and head on over to the new site from now on. Sadly this will therefore be the last post on this site but it all continues at the new location so fear not ;-)

See you on the other side folks...

Friday 16 March 2007

New Photo blog coming

If you're a regular visitor here and are wondering why it has been a little quiet lately, that's because we are working on a lot of 'stuff' behind the scenes. There are big expansion plans for the main Fotoviva Photography site but also we have been busy applying the final touches to a new blog which will be finished next week.

We will post the new blog link here when it's done and hopefully we'll have a big announcement when the new blog goes live.

Until then, keep shooting and please visit the site!

Thursday 1 March 2007

Free Desktop Wallpaper!

On Fotoviva we now have a monthly wallpaper you can download for free to pimp your computer screen! Different pictures will be made available every month so you can choose as you like and bring a bit of beauty to that dull old PC!

Come and have a look at this month's free wallpaper and check out our new photo uploads while you're there. We have some nice snow pictures and a wonderfully atmospheric straw hay bale image in our landscape photography section.

Saturday 27 January 2007

New Picture Upload


Here's a new photo you can buy on fotoviva in the Architecture series of images.

This has been enhanced using Photoshop to really show off the gold colours against the gritty walls. It was taken in the quaint town of Lagos in the Algarve which is a really nice ancient maritime town to visit if you go to Portugal. The old town has some fine examples of old school architecture which looks so much better than the bland structures that go up these days. I guess it's all down to money in this day and age where it's cheaper to build plain buildings than make them look individual and with character. I know what kind of building I would like to look at though!

For more information on Lagos go to the wikipedia page.

Create a soft focus effect

Here's an easy way to create the effect of a soft focus filter on your camera using Adobe Photoshop. You may have to adjust the settings to suit your photograph and the resolution but it gives you the general idea.

1. Open your photo in Photoshop.
2. Duplicate the layer by going to the LAYER menu and selecting DUPLICATE LAYER.
3. From the FILTER menu go to BLUR>GAUSSIAN BLUR and apply a setting of 15-25. This is based on a 6MP image. Use a little less for smaller images or more for 8-10MP pictures. This will apply the blur to the duplicated top layer.
4. From the layer pallete, reduce the opacity of the top blurred layer to around 10-40%. Play with the opacity until you are happy with the result. This allows the sharpness of the original layer to show through whilst creating the soft focus effect on the top layer.
5. Go to LAYER>FLATTEN IMAGE to make the photo just one layer and save.

You can play with the layer effects in the layer pallete before flattening to create some special effects. From the blurred layer select OVERLAY or SOFT LIGHT and see how it effects the image. You can create some really interesting effects by choosing how the top layer blends with the original. Play with the opacity again if you choose another blend mode.

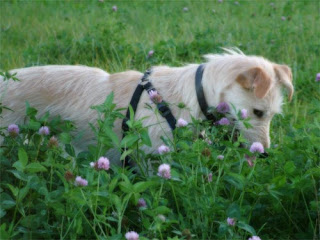
Here's an example of the soft focus effect as seen on one of my dogs...click for larger photograph
Saturday 20 January 2007

New Picture Upload


Our newest addition to the fotoviva library is a nice monochrome photograph of Coniston Water in the Lake District. This shot was taken a couple of years ago using my old Fuji S7500 camera. I have retouched it in Photoshop and added a subtle soft focus glow.

You can purchase this art print in our Black and White Art section at the Fotoviva online gallery store.

In the coming weeks I'll be posting a blog showing you how to create a really nice soft focus effect to your images using Photoshop. Stay tuned folks!

Sunday 14 January 2007

Another New Upload


Another addition to the black and white images category on the fotoviva website, this twisted old tree was captured in the Lake District last year on a hike up around Coniston Lake's hills. There really is so much photo opportunity up in the Lakes and we hope to go there again later this year.

You can find this image in our Black and White wall art section of fotoviva.

Saturday 13 January 2007

New photograph uploaded!


We have just uploaded this beautiful Amaryllis photo taken just a few days before it fully flowers. This image is available in all sizes and was taken with a Nikon D50 in RAW mode. It is available in all sizes as either giclee canvas print, acrylic photo mount or as a quality poster print. You can find the image in our Macro Photo Art collection and is available to purchase using the secure Payapal system.

Friday 5 January 2007

Shoot in RAW

One of the best things I have come across to help perfect your photos is to shoot in the RAW format rather than JPG. Some photographers would disagree and say you should get the shot right first time in camera without post processing on the computer, but I disagree. With RAW you can either make minor adjustments to make it perfect or drastic changes to give your image a different 'feel'. Most of the pictures on fotoviva are taken in RAW mode.

If you have a point and click camera, chances are you won't have the RAW option, but if you have a DSLR or bridge camera you should find it under your settings. You will also need a program such as Adobe Photoshop or some other image software that supports RAW files. Photoshop is one of the best and has some great features in the program.

So what is so good about RAW?
When shooting in standard JPG format your camera takes the settings and creates a jpg with them. With RAW your camera takes the settings but does not embed them into a file. It simply says "these are the settings you used, but feel free to change them to suit before finalising to jpg.

You can change the white balance, exposure, contrast, and many more settings. It's well worth it to get that perfect result. But remember, it's always best to try and get it as near to perfect as you can in the first place, rather than relying on with RAW settings.

You can find a great tutorial by Adobe here.

Tuesday 2 January 2007

Happy New Year!


Thanks for checking out Fotoviva Art Print's first blog posting, and a happy new year to you!

Back at the Fotoviva Art Prints art store you can expect some changes to the site and many more quality photographs being uploaded. We hope to offer a framing service soon and are currently looking for a good supplier in the UK. Plenty of other secret surprises are planned for the site so stay tuned!

Best wishes,
The Fotoviva team